

By Chris Erwin
I think I can safely say almost every fisherman at one time or another has lost an eye or broken an eye on one of his or her fishing rods. In this short column I’m not going to try to teach you how to build your own fishing rod.
However, I have been building custom fishing rods since the mid-70s. At one time in the mid-80s, I was building at least two rods a month. While I do have some factory G.Loomis rods, I prefer to build my own.
Today I would like to walk you through replacing one eye. Once you can do that you will be on your way to building or repairing your own rods. I want to get right to it, and I will try to make this as simple as possible.
Other than the tip, all the guides (eyes) are wrapped on your rod the same way. They are many ways to wrap guides on a rod. However, you want to look at your rod and take a few mental notes.
To begin with are your guides single feet or double foot guides. You obviously want to replace a guide in the same manner as the rest of the guides on the rod.
Secondly was the rod wrapped with an under-wrapping before the guide was placed on the rod. The easiest way to see this is to look under the guides that are still attached to your rod. If they have an under-wrapping, the guide will be sitting on the threads and not on the naked rod. If it is on the naked rod, you don’t have any under wrappings.
The next thing you want to note is the color of the wrappings. You will want to pick a spool of color-fast rod wrapping thread in a color that matches the rest of the rod. If you don’t get color fast thread, you will need to get a small bottle of color preservative. You can get it at the same place you buy the thread.
Other things you will need are single edge razorblade, a grease pencil; I usually use white, some two-part clear epoxy and a small art brush. Since we are only talking about repairing a single eye, it’s not necessary to purchase some kind of rod wrapper. Instead, we will use a hard bound book. This will give us the regulated tension we need to wrap the thread.
How this will work is when you get set up at your workspace, you will place the book on the table putting the thread on the far side of the book. Open the book, run the thread down the middle of the pages. Close the book; pull out a little thread. If you don’t have resistance on the thread place something on the book to compress the pages creating more tension on the thread.

Now we are at the point where we want to take the grease pencil and make a mark where the old thread stop and started. Then clean off any old threads being careful not to remove your marks. You can do this with clean cloth and little rubbing alcohol (just damp not wet). Now we are going to wrap on the new eye.
The first thing you want to do is to pull off about 10 inches of the thread. Cut it and lay it where it’s easy to reach. This is going to be your locking thread.
Next place the rod where your new eye location is, that is where your thread is coming out of the book. Pull the thread out and wrap it around the rod once, turn in about a half to an inch of thread, so as you roll the rod you are covering up the half-inch.
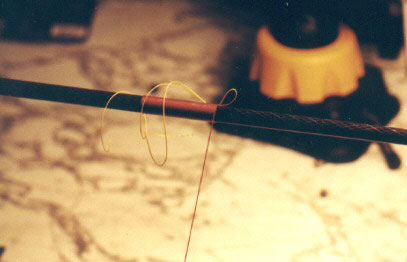
Once you make a few revolutions it should lock the thread. Now you just wrap on the thread keeping the thread close together. When you get to about a quarter of an inch to your end mark you want to loop the 10-inch piece of thread to create a loop on the end.
Lay it on the windings so that the loop extends out pass your end mark, I do this so the loop in on the bottom side of the guide. Now finish winding down to your end make.
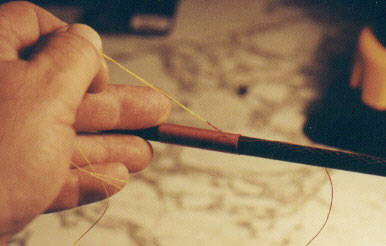
Hold the thread tight with your finger and clip it off three or four inches longer, leaving a tag end. Now slide the clipped end into your loop and pull it through. Cinch it down and careful cut it near the windings.
If you had an under winding you are now ready to wind on the eye, if you had no under winding you follow the same steps except you place the eye on the rod first. You can make it stay in place by using one drop of super glue; hold it until it dries before you begin.
If you are using color preservative, you apply it once your eye is wrapped. It must dry. Follow the directions on the bottle.
Otherwise, you mix up your epoxy and apply a coat over the threads and against the feet of the guide. You must continue to turn the rod until the epoxy dries enough so it’s no long sagging.
There you have it, your first replaced guide.
Chris Erwin is the Author of Camping Kentucky, founder and publisher of Kentucky Angling News an on-line magazine available at www.kentuckyangling.com/magazine Chris can be reached by email chris@ashlandbeacon.com

Be the first to comment