
By Chris Erwin

[dc]W[/dc]ind, rain, and cold frozen roads. It all makes me want to hibernate until spring, but since that’s not something many of us can do it just might be a good time to try your hand at building some fishing lures or even building your own fishing rod.
Today I would like to share with you some of the new products that are out there to help you build some really professional looking lures that you can make right on your kitchen table.
I have been making wooden fishing lures for a long time. I have also built some of them for friends. The problem is it’s very time consuming. I sometimes had two or three days in making one crankbait, making it impossible to build them to sell or even to replace the ones that fall into poor condition.
While this has been true for many years, things are changing. New products are coming on the market that once you break the learning curve, you can produce a crankbait in an hour instead of days. You can make each one of them exactly like the first with very little sanding and with only a few tools.
So what products am I talking about? Rapid Prototyping Plastic! If you have made your own plastic worms, you have half the battle won.
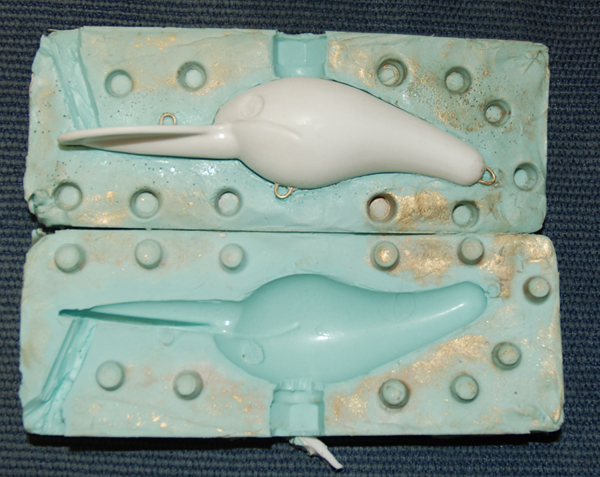
First, you need to make your mold. You can do this using your wood baits, or you can fashion your baits using a clay called Sculpt-it. With this clay, you can make your bait then bake it in the oven until it gets hard, and then make your mold from it. The mold can be one piece or two pieces. I happen to prefer the two-piece mold so I can make my own wiring harness and cast it all at once.
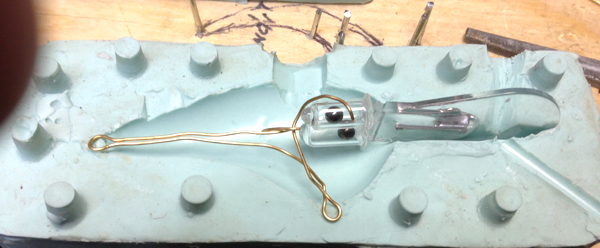
I will be posting more complete instructions on the website, but today I just want to walk you through the process. Once the mold is made using RTV silicone, the next step is to make your wiring harness. I use gold craft wire. This is very easy stuff to work with and it makes tuning your baits easy once you’re on the water.
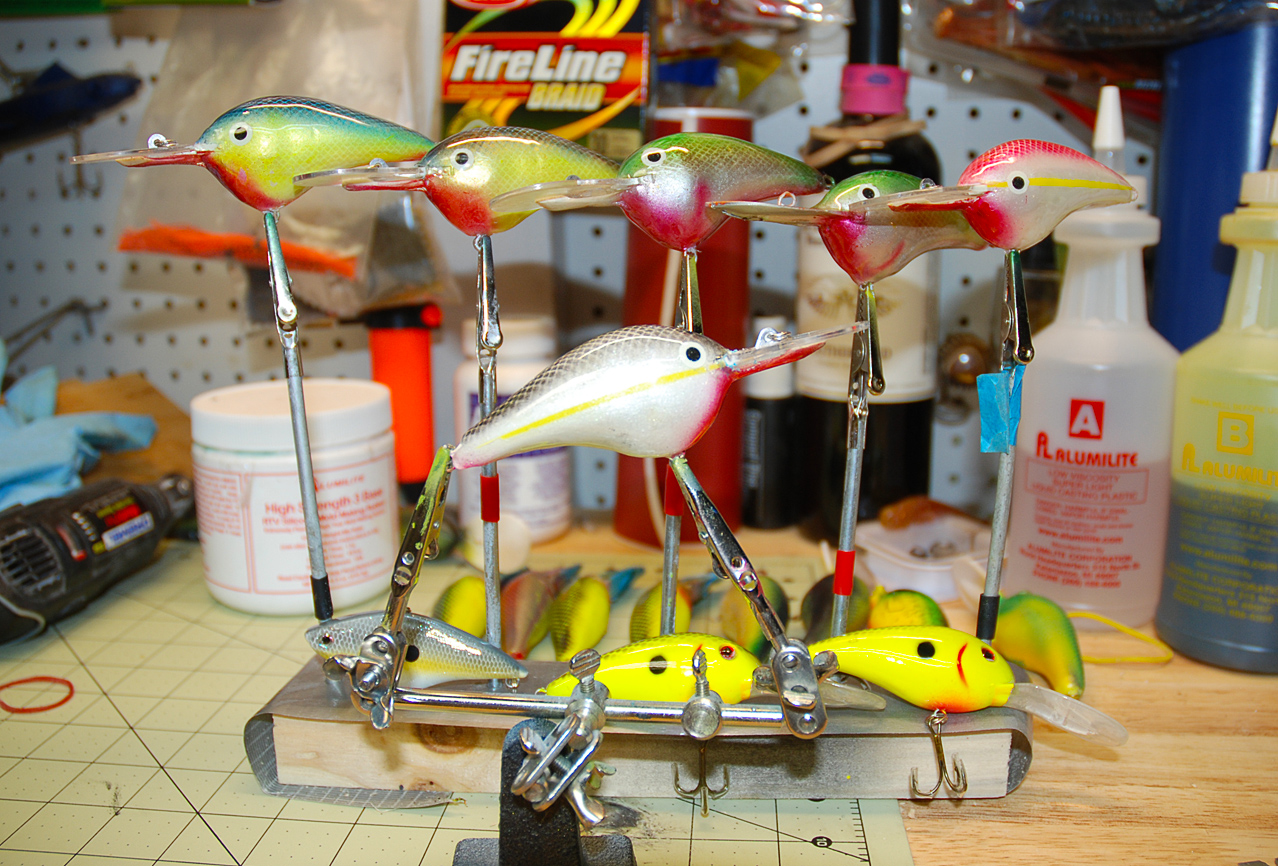
You can pour your bills or add them from pre-made ones that you can purchase. In the pictures, I have added the pre-made ones. I super glued the wiring harness to the rattles, which I glued to the back of the bill.
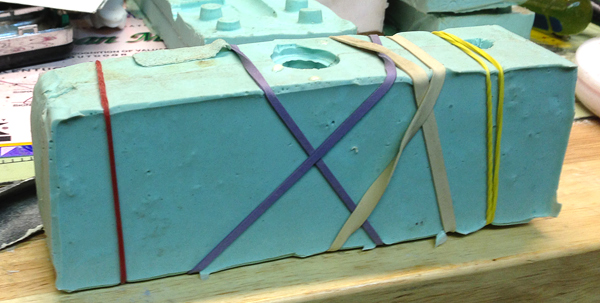
Now you’re ready to pour your plastic. I use a product called Aumilite white rapid prototyping plastic. This is a two part much like epoxy. It’s a 50/50 mix, then you can add some additives to make the bait lighter or heaver. To make it lighter, we add a product call Microballoons. To make it heavier, we use tungsten. The whole point here is to make our bait work with the same action as its wood counterpart. We can do this by looking up the specific gravity of, let’s say cedar. Using a scale, we can adjust our mixture to produce the same displacement making our plastic bait work the same as our wood baits.
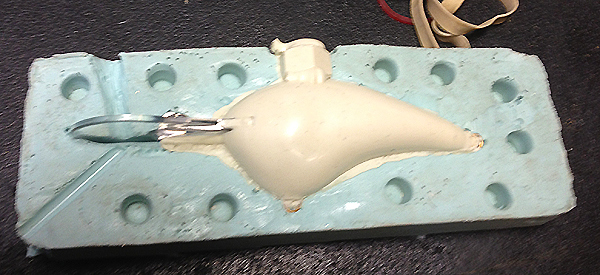
Once the bait is cast, we just sand off the flash and paint it with primer, then color it any way we like. These baits are solid, so they won’t crack and fill with water. After painting they are ready for split rings and hooks.
If the cabin fever gets to be too much, try making a few of your own baits.
Chris Erwin is the founder and publisher of Kentucky Angling News an on-line magazine available at www.kentuckyangling.com/magazine.

i made my own crankbaits like this and the do not swim at all, they sink to the bottom and have zero action, what am i doing wrong
If you are using rapid prototyping plastic like alumilight you can add microblooms to make them float if you want to tell me product you are using I’ll try to help
Chris Erwin
Hi I to have come up with a great lure not a soft plastic worm but a great crank lure. I have over 50 working proto types made up. I would love to start my own company making them but lack of funding and no patent on them has me looking for a backer.. and someone to make a good mold .. would you have any ideas .
Where are your complete details for making your molds.
Thank you,Alan
I didn’t write a complete break down of every stage of making my molds. I was a tool and Die maker for 18 years some of it just come second nature to me. However, the goal was to spark interest in doing projects like this in the off season. They are plenty of website that explain how to make molds its not that hard. but if you are have a issue with something you might post it and I’ll see if I can help. My lures run correctly, the float (the ones I want to float) I may have to tune a bait now and then but most of the time they run right.